Flipper Zero
Last updated
Last updated
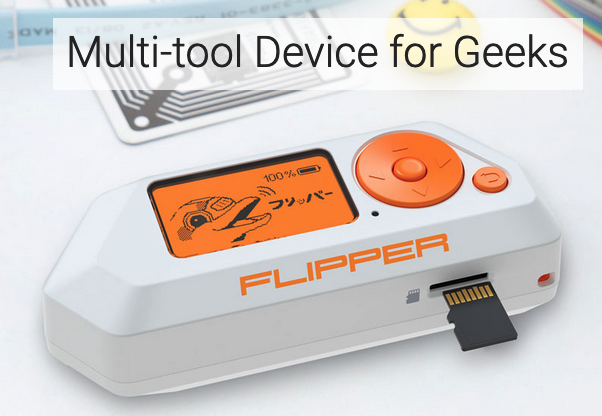
Once you've received your Flipper Zero, you will need to set it up.
You will need an SD card in order to play with your flipper zero, it is pretty much useless without it. You can not buy any SD card, you will need a specific one, see here the requirements. You can also check the same link to format the SD Card through the flipper. It is pretty straightforward. They mention in the documentation that it is not necessary to buy one that is more than 32 GB even though it will still work with more. Here is the one I got from Amazon Canada.
Once the SD card is inserted and formatted, you will be able to update the firmware. Here is how to do this:
Get the app on your computer from this link
Install it
Plug your flipper to your computer and update the firmware, really straightforward as well.
For more information, you have the full chapter about the firmware update in the documentation here.
Once again something really simple you can clone a remote. Here is how to do it:
In the menu go to Infrared
Click on learn new remote
Point the remote at the IR port and push the button you wish to clone (every button will be saved separately)
Now you can use your flipper as a remote. Pretty cool.
Thanks to Shuriken Hacks you can see how to do this in his video :)
Check out the ios attacks you can try with it here
If you have the WiFi dev board, you can use it like you would use a pineapple wifi.
Steam Labs has an amazing video about this:
Here are the steps (some from the video some you have to do prior):
(Prior watching the video) Flash your flipper with a firmware that has the marauder attack, Steam labs uses the Rogue Master firmware, I use the Xtreme firware (you can see above how to flash it)
Flash the firmware on the devboard. Steam labs uses this one by UberGuidoZ
You have a music player in the flipper zero.
You want to make your own music. It is possible. Use this RTTTL Online tool to hear what it is going to look like.
This documentation by tonsil is also really good
To convert notes to letter notation. If you are like me and never remember how to convert solfege notation to letter, here is a matrice
Solfege notation | Letter notation |
---|---|
DO | C |
RE | D |
MI | E |
FA | F |
SOL | G |
LA | A |
SI | B |
If you want a flat (bemol) you will need to use you musician skills. I could not find a way to make a bemol except by using its sharp equivalent so for example if you want mib you will need to use re#.
Here are a few possibilities for this scenario
reb is do# = C#
mib is re# = D#
solb is fa# = F#
lab is sol# = G#
sib is la# = A#
fab is mi = E
dob is si = B
To calculate the tempo we use a metronome one click of a metronome is a beat.
Italian | English | BPM |
---|---|---|
Largo | Large | 40 - 60 |
Lento | Slow | 52 - 68 |
Adagio | Adagio | 60 - 80 |
Andante | Andante | 76 - 100 |
Moderato | Moderate | 88 - 112 |
Allegretto | Allegretto | 100 - 128 |
Allegro | Allegro | 112 - 160 |
Vivace | Lively | 120 - 140 |
Presto | Fast | 140 - 200 |
Prestissimo | Very fast | 140 - 200 |
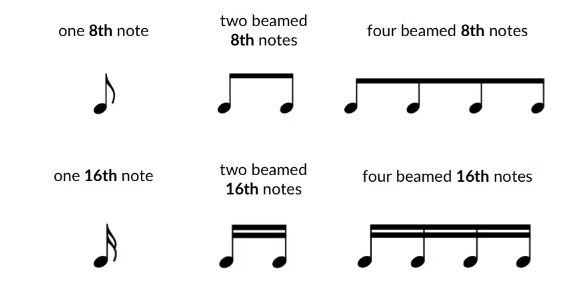
Depending on the piece the tempo will be different. You will have to calculate according to this. These images from flowkey can help us. We can assume (even though it is not always true) that for example if it says on a music sheet allegro moderato 120 the quarter note will be 120 bpm and we will calculate the other according to this.
Here is a link to the folder where I will put the music files I will make using this methodology.
See Dana Epp's blog article here for a detailed explaination on how to do this
Enumerate the wifi availables, find the wifi you are targeting (⚠️reminder to stay legal and ethical⚠️). (from the "List" item in the menu) Write down the number of the wifi you are targeting
Select the targeted wifi from the "Select" item in the menu
Launch deauth attack from the "Attack" item in the menu
Launch rickroll attack from the "Attack" item in the menu
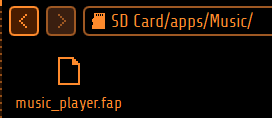
I changed the path but in mine it is here
You will have to put the music files in this folder. They can be txt file or fmf (flipper music file)
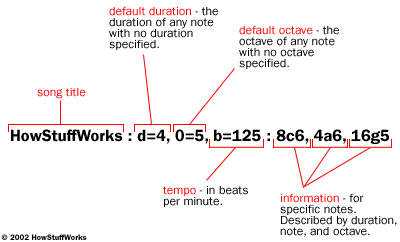
And then you can use this documentation by neverfa11ing to create the file. I really like the image he shared. It is really comprehensive in one look